Unlocking Nature’s Bounty: Crafting Free Liquid Fertilizer Using an Ancient Method
In the pursuit of sustainable gardening practices, ancient wisdom often holds the key to unlocking nature’s potential. One such method, largely overlooked but incredibly effective, empowers modern gardeners to concoct their own liquid fertilizer from nearly any organic matter. This comprehensive guide dives into the art of harnessing this age-old technique, enabling you to brew a nutrient-rich elixir that nurtures plant health and growth sans the need for commercial fertilizers.
The Essence of the Method
At the heart of this ancient technique lies fermentation. By allowing organic matter to decompose in water, it breaks down into its elemental nutrients, readily absorbed by plants. This not only recycles waste but also enriches your garden with a potent, natural fertilizer, all at zero cost.
Materials Needed
- A sizable container (with a lid)
- Water
- Organic waste (kitchen scraps, lawn clippings, leaves, etc.)
- A straining cloth or fine mesh
- A stirring tool
Step-by-Step Guide to Making Liquid Fertilizer
- Collect Organic Material: Gather a variety of organic waste, prioritizing plant-based materials. Kitchen scraps (excluding meat and dairy), yard trimmings like grass and leaves, and even weeds can form the foundation of your fertilizer.
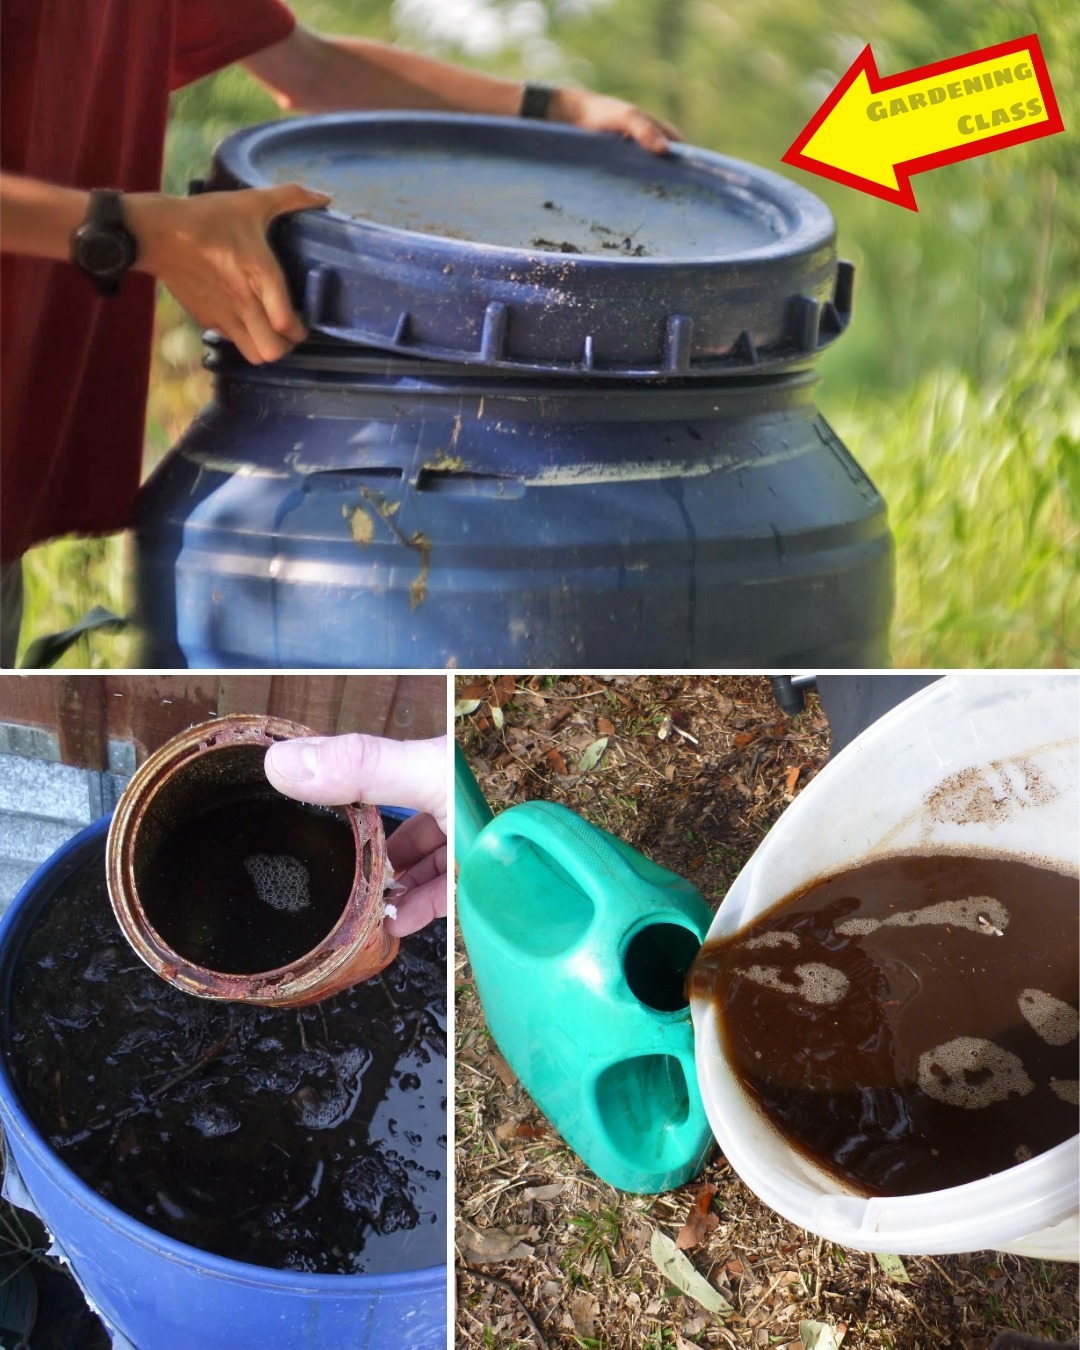
- Prepare the Container: Fill your chosen container with organic material, aiming to fill it halfway. Opt for a container size based on the desired quantity of fertilizer; a standard 5-gallon bucket serves as a good starting point.
- Add Water: Cover the organic matter in the container with water. While rainwater is ideal due to its purity, tap water suffices if left to stand for a day to allow chlorine to dissipate.
- Fermentation Process: Seal the container with its lid, leaving it slightly ajar to permit gas escape. Stir the mixture periodically to oxygenate it and facilitate material breakdown. Fermentation duration varies, ranging from two weeks to two months, influenced by temperature and material composition. Completion is indicated by an earthy scent and significant solid breakdown.
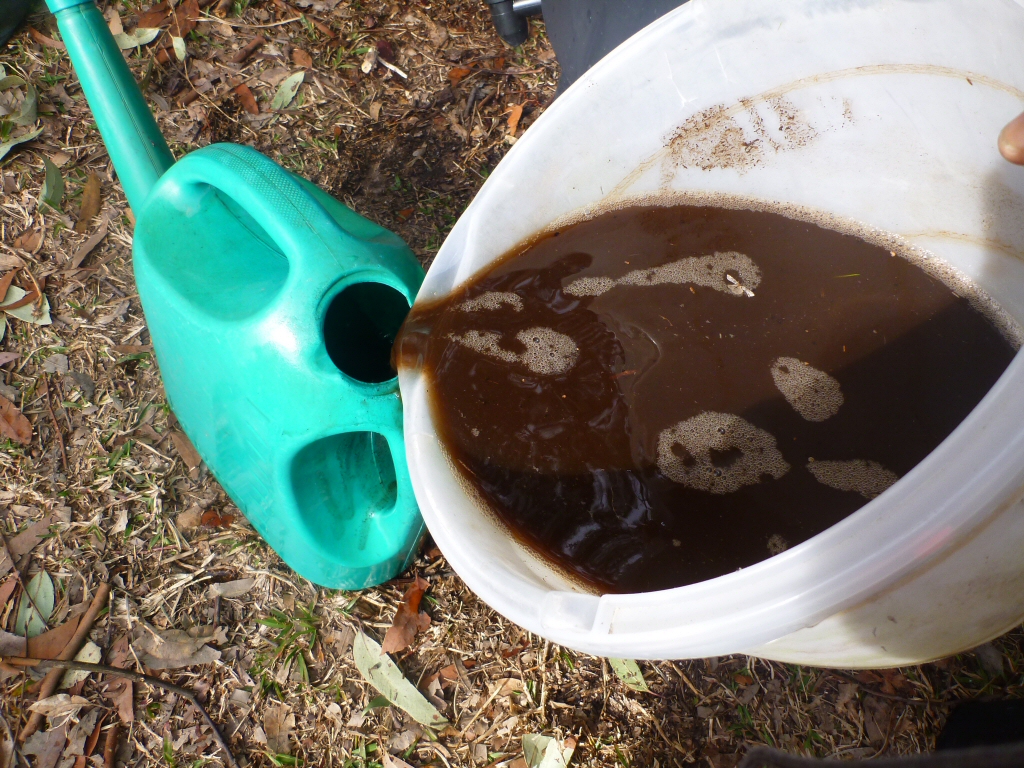
- Strain the Liquid: Upon fermentation’s conclusion, strain the liquid into another container, separating the solid waste. The resulting liquid constitutes your concentrated liquid fertilizer.
- Dilution and Application: Before application, dilute the fertilizer with water to prevent nutrient burn. A common ratio is 1 part fertilizer to 10 parts water, though adjust based on your mixture’s concentration. Apply the diluted solution directly to the soil surrounding your plants.
Benefits and Considerations
- Eco-friendly: This method repurposes waste into a valuable resource, diminishing landfill usage and chemical runoff.
- Cost-effective: Leveraging readily available materials translates to savings on commercial fertilizers.
- Nutrient-rich: The end product brims with essential nutrients, including nitrogen, phosphorus, and potassium.
Embracing this ancient method not only champions sustainable gardening but also fosters a connection to timeless earth-nurturing wisdom. By transforming everyday waste into a precious resource, gardeners contribute to a healthier planet while reaping the abundant rewards of their efforts.