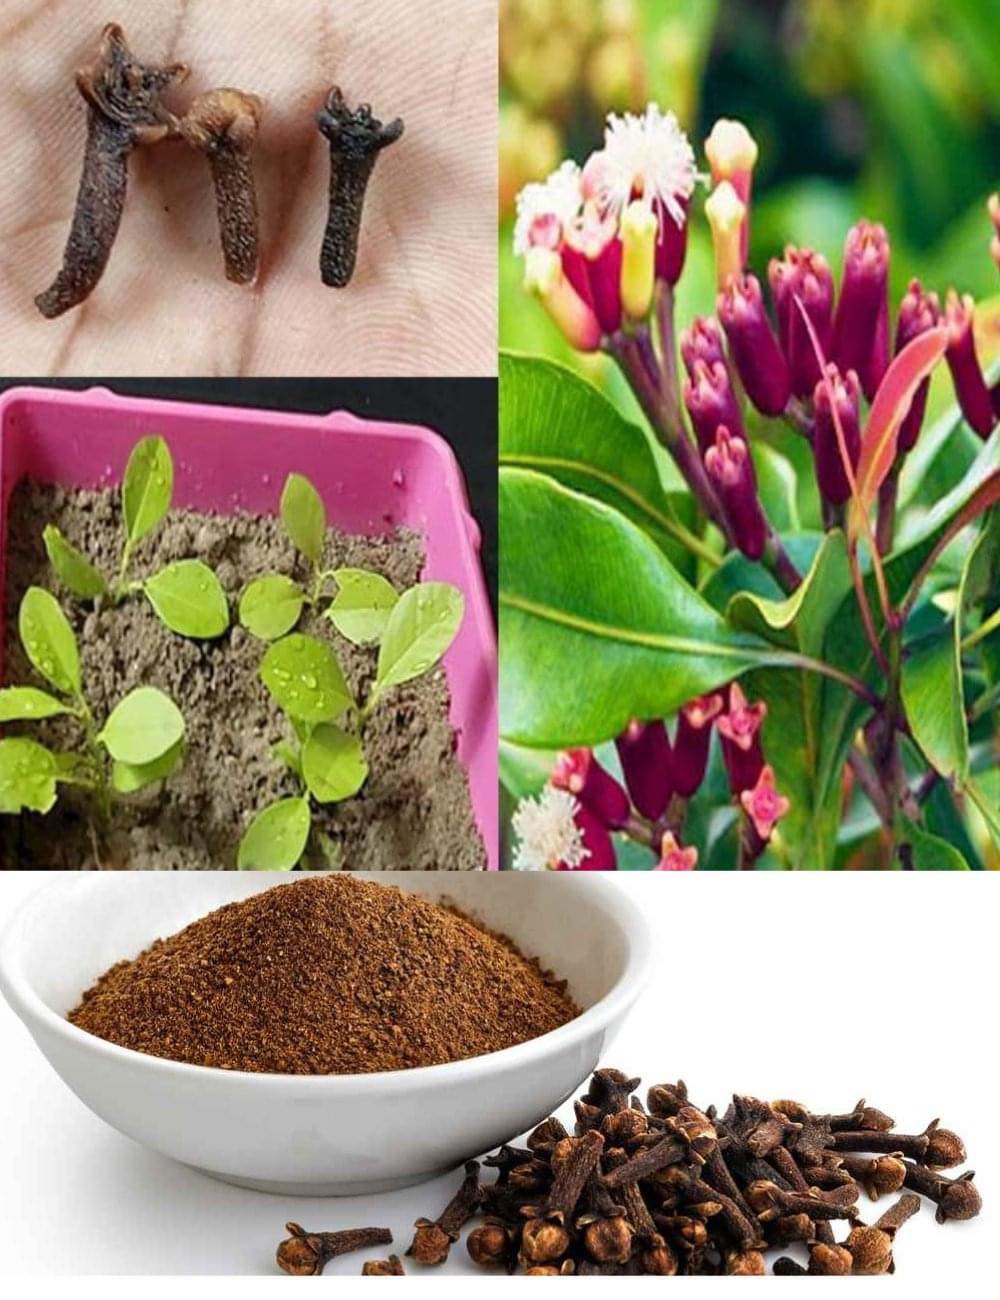
Clove (Syzygium aromaticum) is not just a popular spice; it’s also a beautiful evergreen tree that can be cultivated in a variety of climates.
While cloves are often associated with exotic locales like Indonesia and Madagascar, they can be grown at home with relative ease, offering both culinary delight and ornamental beauty.
Here’s a guide to growing cloves from seed to spice right in your own backyard.
Step 1: Obtaining Clove Seeds
Clove trees produce small, red flower buds that are harvested and dried to create the familiar spice. To grow cloves at home, you’ll need to start with seeds.
While fresh seeds are ideal, you can also purchase them from reputable nurseries or online suppliers.
Step 2: Preparing for Planting
Before planting clove seeds, ensure you have the right conditions. Cloves thrive in tropical or subtropical climates with warm temperatures, high humidity, and well-draining soil.
Choose a sunny location in your garden or consider growing cloves in large containers if you live in cooler climates.
Step 3: Planting Clove Seeds
- Soil Preparation: Prepare a planting area with well-draining soil enriched with organic matter like compost.
- Seed Germination: Plant clove seeds about 1/2 inch deep in the soil. Keep the soil consistently moist but not waterlogged.
- Germination Time: Clove seeds can take several weeks to germinate, so be patient and keep the soil consistently moist during this period.

Step 4: Caring for Clove Seedlings
Once your clove seeds have germinated and seedlings have emerged, it’s time to provide them with proper care to ensure healthy growth.
- Sunlight: Clove trees require full sun to thrive, so ensure they receive at least 6-8 hours of sunlight daily.
- Watering: Keep the soil consistently moist but avoid overwatering, as clove trees are susceptible to root rot.
- Fertilization: Feed young clove trees with a balanced fertilizer during the growing season to promote healthy growth.
- Pruning: Prune your clove tree as needed to maintain its shape and remove any dead or damaged branches.
Step 5: Harvesting Cloves
It typically takes several years for clove trees to mature and produce flower buds ready for harvest. Once the flower buds turn from green to a deep red color, they are ready to be harvested.

- Timing: Harvest cloves when the flower buds are fully developed but not yet opened.
- Drying: Dry harvested cloves in a warm, well-ventilated area until they are completely dry and crisp.
- Storage: Store dried cloves in an airtight container in a cool, dark place until ready to use.
Step 6: Enjoying Your Homegrown Cloves
Once dried, your homegrown cloves are ready to use in a variety of culinary applications.
Whether adding depth of flavor to savory dishes like curries and stews or infusing warmth into baked goods and desserts, your homegrown cloves are sure to elevate your culinary creations.
By following these simple steps, you can enjoy the satisfaction of growing your own cloves from seed to spice, bringing a taste of the exotic into your own backyard.
With patience, care, and a little bit of sunshine, you’ll soon be savoring the aromatic delight of homegrown cloves in your favorite recipes.